How I Paint - Ral Partha Chaos Acolytes
What I'm painting: Chaos Acolytes (Ral Partha #98-108)
I'm using the 2 color Foundry/Dallimore method. Normally, with the "grunts", I'll do one coat. With these guys and their black armor, painting them is super quick and easy, so I took the extra time to go two colors. And yes, I'm one of "those" who uses the el-cheapo craft/hobby paints. I love 'em. I get great results!
Colors used (where two colors given: base/highlight):
Primer: WalMart - Rustoleum Flat Black ($3.98 el-cheapo)
Flesh: Dark Flesh[1] /Americana Base Flesh
Bottom lip: Base Flesh + Delta Ceramcoat Rooster Red
Clothing: Americana Deep Burgundy/Americana Primary Red
Metal Parts: Games Workshop Boltgun/Games Workshop Mithral [2] - not all metal gets highlights
Weapon Wooden Parts: Americana Dark Chocolate
Leather bits: Delta Ceramcoat Raw Sienna
Fur Cape: Americana Cocoa/Folk Art French Vanilla/Americana Titanium White
Black Armor Highlight: Delta Ceramcoat Charcoal
Trim: Games Workshop Shining Gold
 I clean my figures of mold lines and flash. If they have weapons, I mount them now, to get a metal-to-metal bond. If there's any modeling, I'll do that.
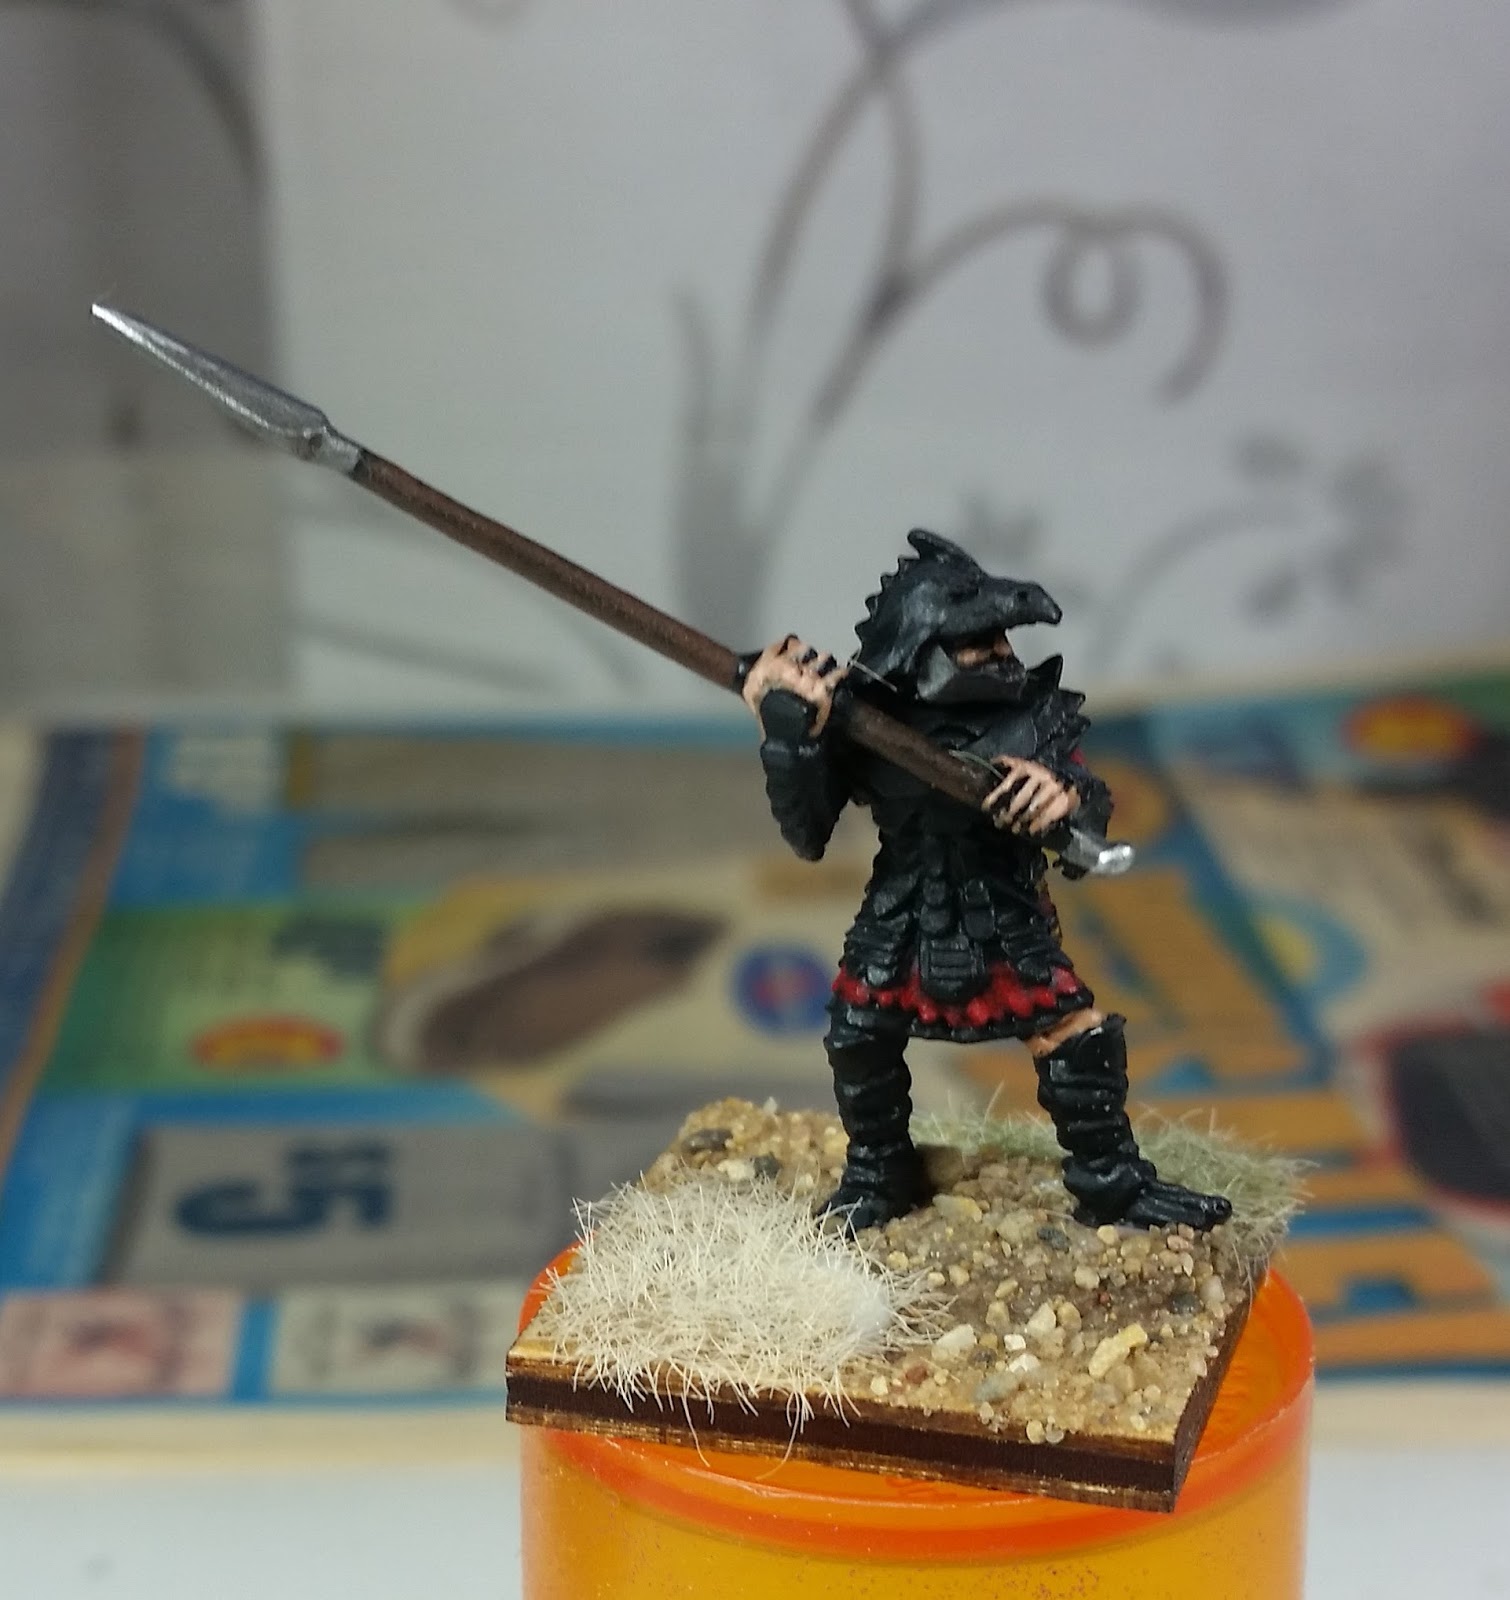
For the three pictured below, one of the figures had their halberd head broke off. I used an extra Ral Partha spear, drilled a hole in the hand and glued it. I use two-part epoxy for my metal to metal connections.
I mount my figures by twos or threes on popsicle sticks with just a drop of superglue to keep them on the stick. Then I put three or four popsicle sticks on a paint stick or piece of cardboard to prime them. I can then use Sticky Tack (which is my most used, most favorite tool) to put the stick on a pill bottle top to turn and hold while painting.
Now we're ready to paint. Sorry if some of the WIP photos aren't the clearest. Apparently I have a bit of the electrician's tremble. Or it's just too much caffeine...
1. First, I do the flesh. Base coat on the faces, hands and exposed flesh, then the highlight. I try to be careful here, but I can always correct mistakes with a bit of black cover-up, since nothing else is painted.
If it's visible, I paint the bottom lip with a bit of red mixed with flesh. The bottom lip is a Dallimore thing. At first, in looking at the blown up pictures in his Foundry Painting Book, I was doubtful. "WTF, going to look like a fake painted dummy!" But... the man knows what he's talking about. It makes the mouth stand out, in much more of a way than I thought it would. So I'm converted.
2. Next, I do the red clothing and horns. The red clothing is pretty easy, a light coat or two of the Burgundy base, then paint all but the recesses with the Primary Red.
For the horns, I paint my first coat of Burgundy light almost all the way to the end. Then a second coat of Burgundy, but only about 2/3ds or so, leaving a bit of the first Burgundy coat showing. Then Primary Red about 1/3d to 1/2 down the horn. Then another coat of red only on the tips or just 1/4 or so. It creates a nice layered effect of a horn going from dark to light and at tabletop distance, it looks great!
I'll also paint the scabbards in Burgundy and leave it at that. Makes a nice look along with the red.


3. Next comes the metal parts. A base coat of Boltgun goes on the metal parts of weapons. In other figures, with shields, I paint the back and fronts in just Boltgun, with no highlight. I'll also overbrush any chainmail with Boltgun, and pick out any other bits that I want to be a darker metal.


4. I hit the leather bits with the Raw Sienna now. Just a base coat, and most of these have very little leather, so it stands out nicely without needing a lot of highlight. These are grunts and at tabletop level, that's good enough. For weapons with wooden parts, like spear shafts or bows, I will do Dark Chocolate, leaving the black in recesses.
One of these figures also had a "fur cape", so I used Americana Cocoa as a base coat. I then did an overbrush of Folk Art French Vanilla on the fur, and then a light drybrush of Americana Titanium White.


5. For the black armor, I do something that I picked up on the Internet, that is to highlight black armor assuming a light source directly above. Here's the video:
So I do very similar, I'll load up my #0 brush with Charcoal, hold the mini under one of my work lamps turned downward and pick out the highlights and paint them. I rotate the mini so that I get all sides. Then I'll take it into "normal" light, back it away, and make sure it looks right. It ends up looking subtle but good.
I should mention that sometimes with handling the minis, especially these Chaos Warriors with the sharp edges and points, the black primer may wear off. So prior to the highlighting, I'll go over the exposed areas with flat black.


6. Now for the final and fun part with the detail bits. First, I pick out highlights and sharp edges on the metal painted with Boltgun and highlight with the Mithral. I go for the higher contrast here, it looks nice.
Then, I pick out some trim and little bits and hit those with Shining Gold. These Ral Partha Chaos Acolyte figures have a lot of neat little bits - faces on small parts of the armor, little intricate scrollworks or small features that look really good. The shields, I will paint the central design in gold, as well as the outer edge. I'll also make sure to hit the ends and metal "rings" on the scabbards. Just enough to really make the figure have a nice look to it. I really like the combination of black, deep red and gold.


7. Now I brush-varnish the figure with Liquitex Matte Varnish. I've had so-so results with Testors Dulcote, and I find that the Liquitex works just fine. A good brushing, without pooling and then I pop the figures off the popsicle sticks and glue them to their bases. I use 1" Litko 3mm bases.

8. Complete the basing. Some sand and static grass and viola! You're going to see the imperfections, this close up, but I will shoot some "tabletop views" later and you can see that they look great for the table!


I can knock out 3 to 4 Chaos Warriors in an evening. Twelve of these guys took about a week to complete.
I may have to get the Warlord, Archers and Cavalry now... I really like how these twelve guys look information!
[1] Dark Flesh is a custom mix - Americana Milk Chocolate + Americana Base Flesh.
[2] I'm nursing these last little bits of the now-renamed and possibly changed GW metal paints.
[3] I use 1" bases because it works for D&D, for Book of War, for Chaos Wars and for One Hour Wargames. (Well, actually, Delta in Book of War calls for 3/4" stands for foot/infantry, but because I already had so many figures on 1" stands, I made everything consistent. His game works wonderfully even with this change.) I'm getting low on my bag of 100 Litko bases and I'm considering going to Ebay to find cheaper.
I'm using the 2 color Foundry/Dallimore method. Normally, with the "grunts", I'll do one coat. With these guys and their black armor, painting them is super quick and easy, so I took the extra time to go two colors. And yes, I'm one of "those" who uses the el-cheapo craft/hobby paints. I love 'em. I get great results!
Colors used (where two colors given: base/highlight):
Primer: WalMart - Rustoleum Flat Black ($3.98 el-cheapo)
Flesh: Dark Flesh[1] /Americana Base Flesh
Bottom lip: Base Flesh + Delta Ceramcoat Rooster Red
Clothing: Americana Deep Burgundy/Americana Primary Red
Metal Parts: Games Workshop Boltgun/Games Workshop Mithral [2] - not all metal gets highlights
Weapon Wooden Parts: Americana Dark Chocolate
Leather bits: Delta Ceramcoat Raw Sienna
Fur Cape: Americana Cocoa/Folk Art French Vanilla/Americana Titanium White
Black Armor Highlight: Delta Ceramcoat Charcoal
Trim: Games Workshop Shining Gold
For the three pictured below, one of the figures had their halberd head broke off. I used an extra Ral Partha spear, drilled a hole in the hand and glued it. I use two-part epoxy for my metal to metal connections.
I mount my figures by twos or threes on popsicle sticks with just a drop of superglue to keep them on the stick. Then I put three or four popsicle sticks on a paint stick or piece of cardboard to prime them. I can then use Sticky Tack (which is my most used, most favorite tool) to put the stick on a pill bottle top to turn and hold while painting.
Now we're ready to paint. Sorry if some of the WIP photos aren't the clearest. Apparently I have a bit of the electrician's tremble. Or it's just too much caffeine...
1. First, I do the flesh. Base coat on the faces, hands and exposed flesh, then the highlight. I try to be careful here, but I can always correct mistakes with a bit of black cover-up, since nothing else is painted.
If it's visible, I paint the bottom lip with a bit of red mixed with flesh. The bottom lip is a Dallimore thing. At first, in looking at the blown up pictures in his Foundry Painting Book, I was doubtful. "WTF, going to look like a fake painted dummy!" But... the man knows what he's talking about. It makes the mouth stand out, in much more of a way than I thought it would. So I'm converted.
2. Next, I do the red clothing and horns. The red clothing is pretty easy, a light coat or two of the Burgundy base, then paint all but the recesses with the Primary Red.
For the horns, I paint my first coat of Burgundy light almost all the way to the end. Then a second coat of Burgundy, but only about 2/3ds or so, leaving a bit of the first Burgundy coat showing. Then Primary Red about 1/3d to 1/2 down the horn. Then another coat of red only on the tips or just 1/4 or so. It creates a nice layered effect of a horn going from dark to light and at tabletop distance, it looks great!
I'll also paint the scabbards in Burgundy and leave it at that. Makes a nice look along with the red.


3. Next comes the metal parts. A base coat of Boltgun goes on the metal parts of weapons. In other figures, with shields, I paint the back and fronts in just Boltgun, with no highlight. I'll also overbrush any chainmail with Boltgun, and pick out any other bits that I want to be a darker metal.


4. I hit the leather bits with the Raw Sienna now. Just a base coat, and most of these have very little leather, so it stands out nicely without needing a lot of highlight. These are grunts and at tabletop level, that's good enough. For weapons with wooden parts, like spear shafts or bows, I will do Dark Chocolate, leaving the black in recesses.
One of these figures also had a "fur cape", so I used Americana Cocoa as a base coat. I then did an overbrush of Folk Art French Vanilla on the fur, and then a light drybrush of Americana Titanium White.


5. For the black armor, I do something that I picked up on the Internet, that is to highlight black armor assuming a light source directly above. Here's the video:
So I do very similar, I'll load up my #0 brush with Charcoal, hold the mini under one of my work lamps turned downward and pick out the highlights and paint them. I rotate the mini so that I get all sides. Then I'll take it into "normal" light, back it away, and make sure it looks right. It ends up looking subtle but good.
I should mention that sometimes with handling the minis, especially these Chaos Warriors with the sharp edges and points, the black primer may wear off. So prior to the highlighting, I'll go over the exposed areas with flat black.


6. Now for the final and fun part with the detail bits. First, I pick out highlights and sharp edges on the metal painted with Boltgun and highlight with the Mithral. I go for the higher contrast here, it looks nice.
Then, I pick out some trim and little bits and hit those with Shining Gold. These Ral Partha Chaos Acolyte figures have a lot of neat little bits - faces on small parts of the armor, little intricate scrollworks or small features that look really good. The shields, I will paint the central design in gold, as well as the outer edge. I'll also make sure to hit the ends and metal "rings" on the scabbards. Just enough to really make the figure have a nice look to it. I really like the combination of black, deep red and gold.


7. Now I brush-varnish the figure with Liquitex Matte Varnish. I've had so-so results with Testors Dulcote, and I find that the Liquitex works just fine. A good brushing, without pooling and then I pop the figures off the popsicle sticks and glue them to their bases. I use 1" Litko 3mm bases.

8. Complete the basing. Some sand and static grass and viola! You're going to see the imperfections, this close up, but I will shoot some "tabletop views" later and you can see that they look great for the table!


I can knock out 3 to 4 Chaos Warriors in an evening. Twelve of these guys took about a week to complete.
I may have to get the Warlord, Archers and Cavalry now... I really like how these twelve guys look information!
[1] Dark Flesh is a custom mix - Americana Milk Chocolate + Americana Base Flesh.
[2] I'm nursing these last little bits of the now-renamed and possibly changed GW metal paints.
[3] I use 1" bases because it works for D&D, for Book of War, for Chaos Wars and for One Hour Wargames. (Well, actually, Delta in Book of War calls for 3/4" stands for foot/infantry, but because I already had so many figures on 1" stands, I made everything consistent. His game works wonderfully even with this change.) I'm getting low on my bag of 100 Litko bases and I'm considering going to Ebay to find cheaper.